Comprehensive Planning for Your Drywall Project
When you are planning a room renovation, a basement finishing project, or patching up water damage, figuring out the exact number of panels required can be tricky. So, how do you figure out the precise amount of material without buying too many extra sheets or running short halfway through hanging panels on the weekend? It is one of the most common questions DIY builders and homeowners face when starting interior walls.
To calculate how much drywall you need, measure the total linear footage of the walls, multiply by ceiling height to get total square footage, subtract openings for doors and windows, and divide by the square footage of a single panel—typically 32 sq ft for a 4×8 sheet. Always add a 10% to 15% waste factor for cuts, breakage, and awkward corners to ensure you do not run out.
Accurate material planning saves you time, reduces vehicle trips to the home improvement center, and keeps your budget on track. Whether you are hanging standard half-inch panels in a bedroom or moisture-resistant boards in a bathroom, understanding the math prevents costly mistakes.
You can verify your room measurements and material totals using our Material Calculator to streamline your shopping list before heading out to buy supplies.
Understanding Drywall Sheet Sizes and Coverage
Drywall panels come in standard dimensions, and choosing the right size can significantly impact the number of seams you have to tape and mud later. The most common sheet size is 4 feet by 8 feet, which equals 32 square feet of coverage per panel. However, manufacturers also produce 4×10 and 4×12 sheets, which are heavily favored by professional contractors working on rooms with tall or long uninterrupted walls.
Using longer sheets minimizes horizontal seams, which speeds up finishing work and reduces the risk of joint cracking down the road. If you are working alone or tackling a DIY project on the weekend, 4×8 sheets are much easier to handle, transport in a standard truck bed, and maneuver through tight stairwells or doorways.
To help you compare coverage across different standard panel dimensions, review the standard sheet breakdown below.
| Sheet Dimensions | Square Footage per Sheet | Best Used For | Typical Weight per Sheet |
|---|---|---|---|
| 4 ft x 8 ft | 32 sq ft | Standard rooms, DIYers, low ceilings | Approx. 54 lb (1/2″) |
| 4 ft x 10 ft | 40 sq ft | 9-foot ceilings, fewer vertical joints | Approx. 68 lb (1/2″) |
| 4 ft x 12 ft | 48 sq ft | 10-foot ceilings, large open spaces | Approx. 81 lb (1/2″) |
Keep in mind that thicker panels, such as 5/8-inch Type X fire-rated drywall, weigh substantially more than standard 1/2-inch panels. Always account for panel weight when deciding whether you need a helper or a mechanical panel lift to hoist sheets onto the ceiling.
Step-by-Step Drywall Estimating Formula

Calculating drywall requirements manually requires a straightforward sequence of measurements and arithmetic. Do not just guess based on floor space alone, because wall area depends heavily on perimeter length and ceiling height. Follow this step-by-step formula to arrive at a reliable planning estimate for your walls and ceilings.
First, measure the perimeter of the room in linear feet by adding the lengths of all four walls together. Next, multiply that total perimeter by the ceiling height to get the gross wall area in square feet. For example, a room with a 40-foot perimeter and an 8-foot ceiling has 320 gross square feet of wall space.
Second, measure all doors and standard windows, then calculate their combined square footage. Subtract this total opening area from your gross wall area to find the net wall area. If you are also replacing or installing drywall on the ceiling, multiply the room length by the room width and add that square footage to your net wall total.
Finally, divide your total net surface area by the square footage of the drywall panels you plan to buy. For 4×8 sheets, divide by 32. Take that raw sheet count and multiply by 1.10 or 1.15 to factor in a 10% to 15% waste allowance for cuts, outlets, and mistakes.
Calculating Drywall for Standard Room Sizes
Room layouts vary widely, but standard residential dimensions give us a reliable baseline for material estimation. A small bedroom, a standard living room, and a large basement all require different sheet counts depending on door and window counts. When using a drywall calculator approach, breaking down spaces by standard room sizes helps you double-check your manual math.
Consider a standard 12×12 bedroom with 8-foot ceilings and one standard door plus one window. The total wall perimeter is 48 feet. Multiplying 48 by 8 gives 384 square feet of gross wall area. Subtracting roughly 40 square feet for the door and window leaves 344 square feet of net wall. Adding a 12×12 ceiling (144 square feet) brings the total surface area to 488 square feet. Dividing 488 by 32 yields roughly 15.2 sheets, which rounds up to 16 panels before applying a waste factor.
Below is a quick reference planning table showing estimated sheet counts for various room dimensions with standard 8-foot ceilings.
Try Our Free Calculators:
| Room Type & Size | Approx. Surface Area (Walls & Ceiling) | Base 4×8 Sheets Needed | Recommended Sheets (with 10% Waste) |
|---|---|---|---|
| Small Bedroom (10×10 ft) | 376 sq ft | 12 sheets | 14 sheets |
| Standard Bedroom (12×12 ft) | 488 sq ft | 16 sheets | 18 sheets |
| Large Living Room (15×20 ft) | 840 sq ft | 27 sheets | 31 sheets |
| Basement Space (20×30 ft) | 1,200 sq ft | 38 sheets | 43 sheets |
Estimated Drywall Sheets by Room Size
Chart note: Estimated 4×8 drywall sheet counts including a 10% waste factor for standard 8-foot ceilings.
These figures serve as planning estimates, not rigid contractor guarantees. Actual counts vary depending on how many closets, corners, soffits, and architectural cutouts exist in the space.
Choosing the Right Thickness and Drywall Types

Not all drywall is created equal, and choosing the incorrect thickness or panel type can lead to sagging ceilings, code violations, or moisture damage. Building codes governed by the International Residential Code (IRC) specify exact minimum thicknesses for walls and ceilings depending on framing spacing.
Standard 1/2-inch drywall is the universal choice for interior walls framed on 16-inch centers. For ceilings where framing joists are spaced 24 inches apart, building codes often require 5/8-inch drywall or a specialized lightweight ceiling board to prevent sagging between the framing members over time.
Moisture-resistant drywall, often identifiable by its green or purple paper facing, is mandatory in bathrooms, laundry rooms, and around kitchen sinks. For shared garage walls or furnace rooms, Type X fire-resistant drywall with glass fiber additives is required by local building departments to slow the spread of fire.
You can explore potential material expenses and check your overall budget by using our Material Cost Calculator before purchasing specialized panels.
Accounting for Waste, Cuts, and Breakages

One of the most common mistakes DIY builders make is ordering the exact mathematical number of drywall sheets without adding a waste factor. Drywall is brittle, corners require tricky cuts, and edges inevitably get chipped or cracked during transport and installation.
A standard waste factor of 10% is appropriate for square, simple rooms with minimal doors, windows, or architectural obstacles. If your space features vaulted ceilings, arched entryways, numerous electrical outlets, or complicated angled walls, increase your waste allowance to 15% or even 20%.
Ordering extra sheets upfront is far more cost-effective than making an emergency mid-project run to the lumber yard for two extra panels. Partial scrap pieces can often be saved and cut down to patch small holes or fill narrow gaps above doors and windows.
For complex remodeling estimates, you can coordinate your material totals with our Construction Cost Calculator to keep tabs on ancillary items like framing lumber and fasteners.
Estimating Joint Compound, Tape, and Screws

Hanging the drywall panels is only half the battle; you also need to calculate the finishing materials required to tape, mud, and sand the joints before painting. Running out of joint compound or drywall screws in the middle of a taping session halts progress instantly.
As a general rule of thumb, you will need approximately 1 pound of drywall screws for every 100 square feet of drywall surface area. Coarse-thread screws work best for wood framing, while fine-thread screws are designed for metal studs. For a standard room requiring 20 sheets of 4×8 drywall, plan on purchasing a 5-pound box of screws.
Joint compound, often referred to as mud, is typically estimated at roughly 0.5 to 0.75 gallons (or pounds of dry powder) per sheet of drywall. For 20 sheets, you will need approximately one 5-gallon bucket of all-purpose joint compound or equivalent powder mixes.
Paper tape or fiberglass mesh tape should equal roughly 1.5 to 2 times the linear footage of your seams. You can fine-tune these auxiliary quantities using our Drywall Sheet Calculator or consult project guides from trusted sources like Family Handyman.
Common Drywall Estimating Mistakes to Avoid
Accurate estimation requires attention to detail and an awareness of common pitfalls that throw off calculations. Avoiding these errors ensures your project runs smoothly from delivery day to final priming.
Also Read:
- How Much Does Drywall Cost? 2026 Price Guide
- Tile Calculator: How Many Tiles Do I Need for Your Project in 2026
- Flooring Cost Calculator Guide: 2026 Price Estimates per Square Foot
- How Much Lumber Do I Need? Complete Materials Planning and Calculation Guide
- Siding Cost Calculator Guide: 2026 Prices, Materials & Installation Estimates
- Forgetting to subtract openings. Failing to deduct large windows, sliding doors, or oversized cased openings will result in an excess of leftover panels.
- Ignoring ceiling height variations. Assuming every room has standard 8-foot walls when dealing with vaulted or tray ceilings will leave you short on materials.
- Skimping on the waste factor. Ordering zero extra material guarantees you will run short due to standard cutting errors and broken corners.
- Mixing panel thicknesses incorrectly. Transitioning between 1/2-inch and 5/8-inch drywall without planning for flush framing transitions creates uneven wall planes.
Taking the time to double-check your measurements against the physical framing layout prevents frustrating delays during installation.
How to Measure Complex Rooms and Closets
Simple rectangular rooms are easy to calculate, but real homes feature closets, hallways, bump-outs, and bay windows that complicate the math. To measure complex spaces accurately, break the room down into smaller geometric zones.
Measure each wall segment independently rather than relying on a single overall room perimeter. Note any soffits, HVAC chases, or dropped ceiling sections, as these hidden bulkheads consume surprising amounts of drywall surface area.
Closets require special attention because their small dimensions result in a high ratio of cuts and waste relative to total square footage. When measuring closets, calculate each wall and ceiling surface individually, and add a full 15% waste factor to account for tight-space cutting.
Tools and Equipment Needed for Drywall Installation
Before purchasing your drywall, make sure you have the right tools on hand to handle, cut, and fasten the panels safely. Drywall is heavy and awkward, so having proper equipment is essential for a professional finish.
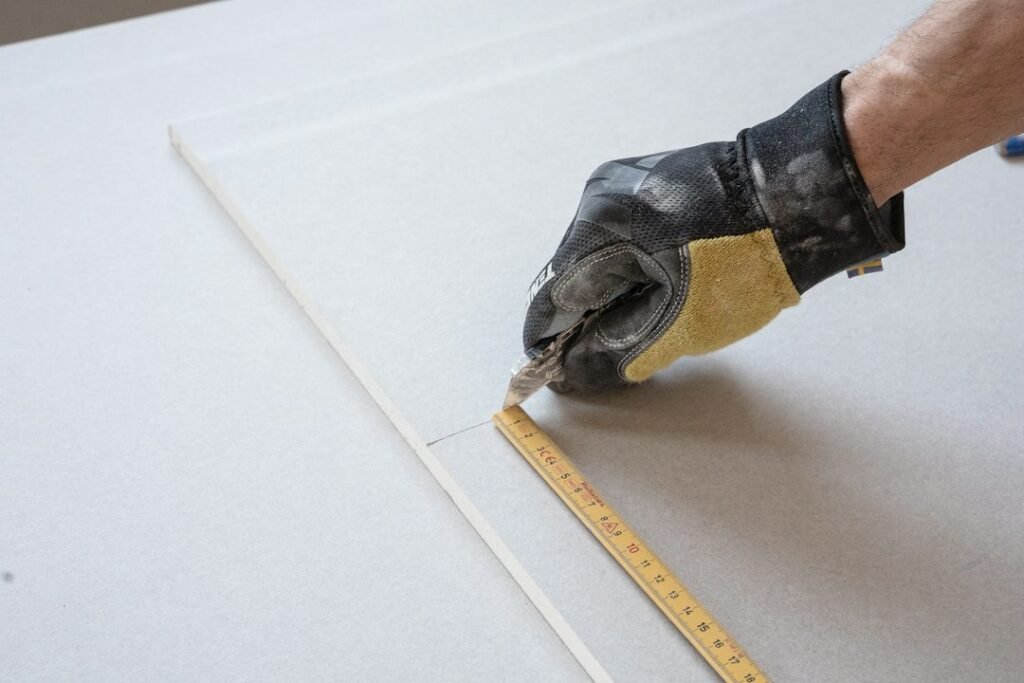
- Utility knife with snap-off blades for scoring and snapping panels cleanly.
- T-square or framing square to guide straight cuts across the width of sheets.
- Cordless screw gun or drill equipped with a drywall dimpler bit to set screws flush without tearing the paper facing.
- Drywall rasp or sanding block to smooth rough cut edges before hanging.
- Panel lift or T-jack if you are hanging ceiling drywall by yourself.
Investing in or renting proper lifting equipment protects your back and prevents damaged panels during overhead installation.
Ordering, Delivery, and Site Storage Tips

Once you finish your calculations, planning how the drywall is delivered and stored on-site is critical to protecting your investment. Drywall is vulnerable to moisture and humidity, which can ruin panels before they ever touch the studs.
Have panels delivered directly into the room where they will be installed whenever possible, as hauling heavy sheets up stairs or down hallways increases the risk of damage. Always store drywall flat on a level surface, elevated slightly off the floor using scrap 2x4s to prevent moisture absorption from concrete subfloors.
Cover stored sheets loosely with a tarp or plastic sheeting if dust or humidity is present in the work area. Allow the drywall to acclimate to the indoor temperature and humidity for at least 24 to 48 hours before starting installation and finishing work.
Detailed Breakdown of Labor and Material Budgets
When budgeting for a drywall project, distinguishing between material costs and potential labor expenses is vital. Even if you plan to install the panels yourself to save money, understanding the complete financial scope ensures you do not get caught off guard by ancillary supply costs.
Beyond the panels, screws, and tape, consider the cost of corner beads for outside corners, specialized sanding screens, primer, and rental fees for specialized tools like drywall lifters or stilts. Corner beads, in particular, come in rigid vinyl or metal variants and must be calculated by the total linear foot of all exterior corners in the room layout.
If you decide to hire professional hangers and finishers, labor is typically priced either per square foot of finished surface area or per board. Professional finishing involves multiple coats of mud with mandatory drying time between each application, meaning labor-intensive multi-stage projects require clear scheduling and staging.
Preparing Your Framing and Substrate Before Hanging
Before a single sheet of drywall is brought into the room, inspect your wood or metal framing to ensure it is structurally sound and flush. Uneven studs, warped framing lumber, or protruding nails will telegraph through the drywall, creating unsightly bulges and shadows once the room is painted.
Check that all framing members are aligned in the same plane. Use a long straightedge across multiple studs to spot any low or high spots. Shimming low studs with cardboard or thin wood strips, or planing down high studs, pays massive dividends during the finishing stage.
Ensure that all blocking is securely installed in corners and around door frames so that every single edge of your drywall panels has a solid nailing surface. Skimping on backing lumber leads to loose panel edges, flexing joints, and eventual tape cracking down the road.
Managing Seams and Joint Layout Strategies
Planning where your drywall joints fall minimizes finishing labor and prevents structural weak points. Professional installers follow strategic layout principles that any DIYer can easily adopt for a superior finish.
Never allow a drywall seam to align directly with the vertical edge of a door or window opening. Framing headers and corner cripples experience natural settling and expansion; placing a joint directly at the corner of a door opening almost guarantees a stress crack over time.
Instead, center panels over openings so that any vertical seams fall at least twelve inches away from door jambs or window frames. Additionally, run your drywall panels horizontally across wall studs rather than vertically whenever possible. Horizontal installation spans multiple studs more effectively and places the primary eye-level joint at a much easier height for taping and feathering.
Troubleshooting Common Drywall Installation Issues
Even with careful calculation and preparation, minor issues can arise during the hanging and fastening process. Knowing how to address these hiccups quickly keeps your project moving forward without compromising structural integrity.
If a screw head breaks through the paper facing during driving, do not leave it bare. Drive a second screw approximately two inches away from the damaged spot, and then drive the original screw slightly deeper while taking care not to puncture the gypsum core entirely. Cover both screw heads with joint compound during the first coating pass.
If a panel edge gets chipped while carrying it into the room, you can salvage the sheet by cutting off the damaged section cleanly with a utility knife or filling the minor void with a setting-type joint compound before applying your paper tape. Always address structural gaps or loose panels immediately before starting the taping phase to ensure a permanent, crack-free finish.
Advanced Drywall Calculation Techniques for Open Floor Plans
Modern home designs frequently feature open-concept layouts, vaulted ceilings, and complex multi-level spaces that make traditional rectangular measurements less effective. When estimating drywall for open floor plans, breaking the vertical planes into distinct zones prevents severe under-calculation.
Start by mapping out tall walls that span across multiple stories, such as two-story entryways or great rooms. Measure the base perimeter of the lower zone and track the peak height of the gable or vaulted ceiling separately. For triangular wall sections beneath sloped rooflines, calculate the area using the geometric formula for triangles: multiply the width of the base by the maximum height, then divide by two.
Remember that working on high walls or vaulted ceilings often requires specialized scaffolding or motorized lift rentals. Incorporating these equipment expenses into your overall planning ensures your drywall project stays fully funded from initial calculation to final clean-up.
Practical Cost Breakdown for a Typical Medium Room
Understanding the financial requirements of a drywall project involves looking at more than just the sheet count. A transparent cost breakdown helps you budget effectively for a standard 12×12 room renovation requiring roughly 18 sheets of half-inch drywall.
First, source standard drywall panels at approximately $12 to $15 per 4×8 sheet, totaling around $250 for panels. Next, budget for a 5-gallon bucket of joint compound at $20, a roll of paper tape at $5, and a 5-pound box of drywall screws at $15. Corner bead for four outside corners will add another $15.
Adding up these core materials brings your direct supply subtotal to roughly $305 before taxes and delivery fees. If you choose to rent a drywall panel lift for the weekend, expect an additional equipment rental cost of $45 to $60, bringing your total self-installed material and equipment investment to approximately $365.
Post-Installation Care and Environmental Controls
Once your drywall is fully hung, taped, and sanded, managing the indoor environment is critical before applying paint or primer. Excess humidity in newly constructed or renovated spaces can react with joint compound or cause wood framing to shift, resulting in hairline cracks along seams.
Maintain a stable indoor temperature between 50 and 70 degrees Fahrenheit during the entire taping and drying process. Avoid turning on high-speed forced-air heating systems immediately if the air is extremely dry, as rapid drying causes joint compound to shrink too quickly and crack.
Use portable dehumidifiers or run continuous ventilation fans in spaces like basements or bathrooms to draw out residual moisture from wet mud coats. Allowing each layer of joint compound to dry completely—usually 24 hours per coat—guarantees a rock-solid, paint-ready surface that will endure for decades.
Frequently Asked Questions
How do I calculate how many sheets of drywall I need?
Measure the total perimeter of the room in feet, multiply by the ceiling height to get gross wall area, add ceiling square footage, subtract doors and windows, and divide by 32 for 4×8 sheets. Finally, add 10% to 15% for waste.
Should I use 1/2 inch or 5/8 inch drywall?
Use 1/2-inch drywall for standard walls and ceilings with framing spaced up to 16 inches apart. Use 5/8-inch Type X drywall for ceilings with 24-inch joist spacing to prevent sagging, or where fire-rated assemblies are required by local building codes.
How much waste factor should I add when calculating drywall?
Add 10% waste for standard, square rooms with few openings. For rooms with vaulted ceilings, numerous angles, closets, or many doors and windows, increase the waste factor to 15% or 20%.
How many drywall screws do I need per sheet?
You typically need about 1 pound of drywall screws for every 100 square feet of wall and ceiling surface. For a standard 4×8 sheet, plan on roughly 32 to 40 screws depending on stud spacing.
How much joint compound do I need for a room?
Plan on approximately 0.5 to 0.75 gallons of joint compound per 4×8 drywall sheet for a full three-coat finish including tape embedding, skim coating, and final feathering.
Can I transport 4×8 drywall sheets in a standard SUV or car?
Standard 4×8 sheets rarely fit inside midsize cars or SUVs safely without damaging the interior or bending the panels. It is best to transport them in a full-size pickup truck with the tailgate down or schedule delivery from your local building supplier.
Final Takeaway
Accurate drywall estimation prevents budget overruns and eliminates frustrating mid-project supply shortages. By following a methodical measuring process and factoring in room geometry, you can purchase the exact amount of material needed for a clean installation.
- Calculate total surface area by multiplying room perimeter by ceiling height and adding ceilings.
- Always subtract major openings like large doors and oversized windows from your gross total.
- Include a 10% to 15% waste allowance for cuts, breakage, and awkward corners.
- Match drywall thickness and type to local building code requirements and framing spacing.
The biggest variables in your material count are room complexity, ceiling height, and the number of architectural cutouts. Use our Drywall Sheet Calculator and Material Calculator to plan your quantities accurately before starting your project.
Estimates vary by location, supplier, and site conditions and should be verified locally.