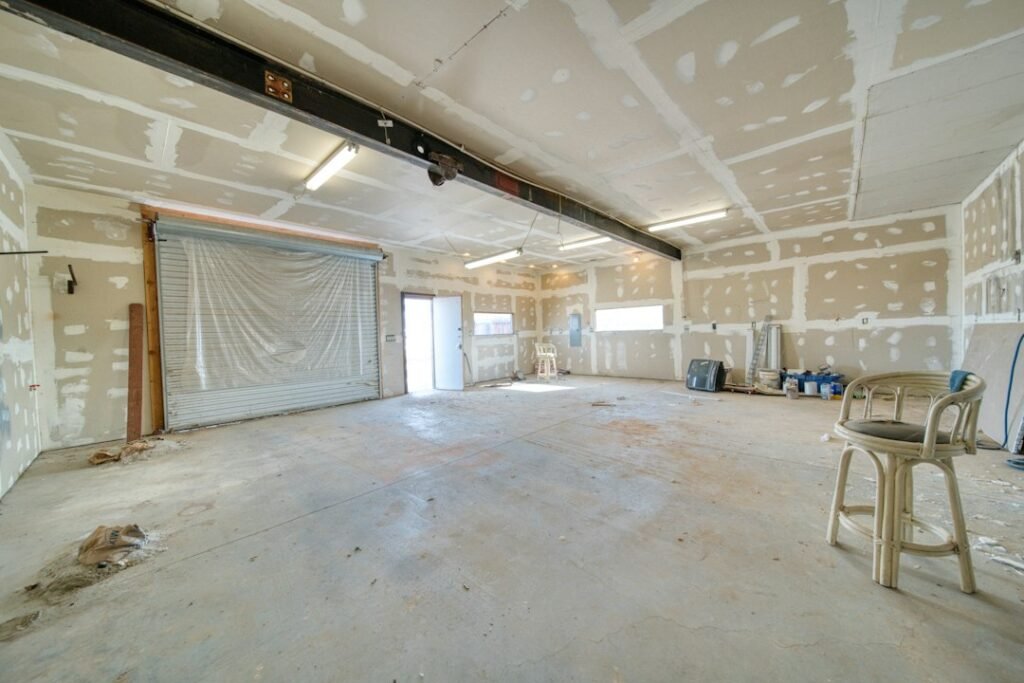
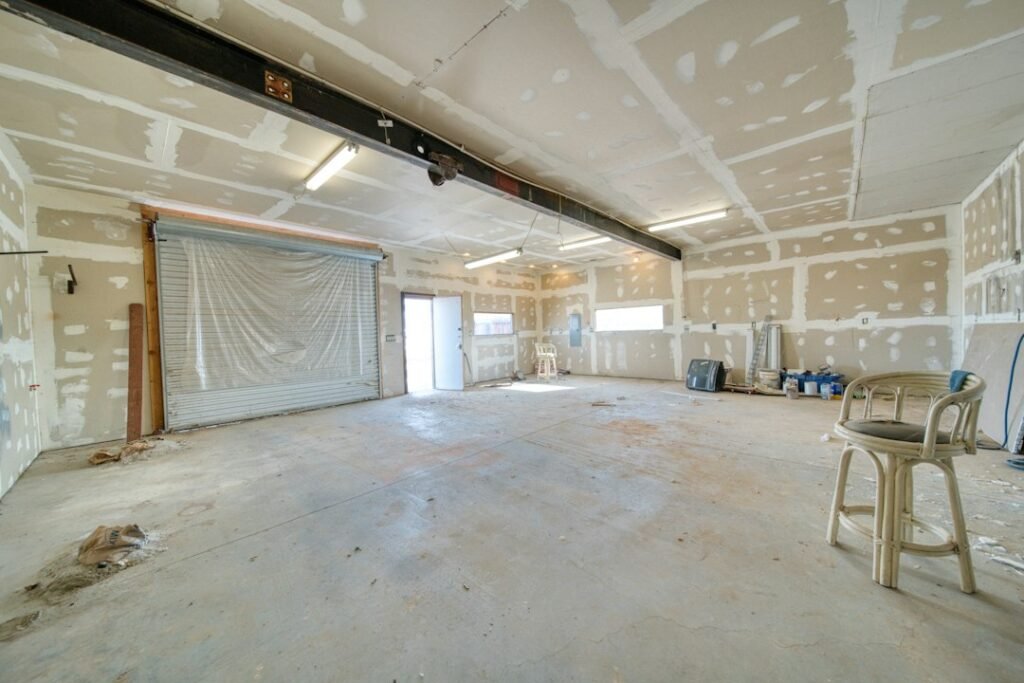
Introduction to Drywall Costs
When you are remodeling a room, finishing a basement, or building a home from the ground up, hanging new wall surfaces is one of the most visible milestones in the project. Naturally, you want to know what financial investment to expect before you start buying materials or calling contractors. So, how much does drywall cost in 2026?

Nationally, the average drywall cost ranges from $1.50 to $3.00 per square foot for both materials and professional labor combined. For a standard 500-square-foot room, total project costs typically fall between $750 and $1,500. Large-scale whole-house installations can lower the per-square-foot price, while small patch jobs or rooms with complex architectural features often push costs higher.
Several core variables dictate your final bill, including local labor rates, ceiling height, sheet thickness, and the chosen finish level. Before committing to a contractor, you can use our Drywall Cost Calculator to establish a reliable baseline budget for your specific project dimensions.
Drywall Cost by Project Size
Project scale is the single largest factor influencing overall pricing. Contractors often provide volume discounts for large projects, such as a 2,000-square-foot house, because setup and travel time are amortized over more square footage. Conversely, tiny projects like a single accent wall or a bathroom remodel often carry a minimum service fee that inflates the per-square-foot price significantly.
The table below provides a planning estimate for various room and home sizes, accounting for standard 8-foot ceilings, materials, hanging, taping, and mudding.
| Project Size | Estimated Total Cost Range | Average Cost per Sq. Ft. |
|---|---|---|
| 100 sq. ft. (Small Room / Closet) | $300 – $600 | $3.00 – $6.00 |
| 300 sq. ft. (Large Bedroom) | $600 – $1,200 | $2.00 – $4.00 |
| 500 sq. ft. (Living Room / Basement) | $750 – $1,500 | $1.50 – $3.00 |
| 1,000 sq. ft. (Apartment / Small Suite) | $1,500 – $2,800 | $1.50 – $2.80 |
| 2,000 sq. ft. (Medium Home) | $2,800 – $5,500 | $1.40 – $2.75 |
| 3,000 sq. ft. (Large House) | $4,000 – $8,000 | $1.35 – $2.65 |
Estimated Drywall Cost by Project Size
Chart note: Estimated total costs for materials and professional installation based on room size.
Keep in mind that these figures represent planning estimates, not guaranteed contractor quotes. Regional labor markets and site accessibility can easily push your actual total to the low or high end of these ranges.
Cost per Square Foot Breakdown

Understanding unit pricing helps you evaluate contractor bids accurately. In the drywall industry, pricing is calculated by the total square footage of the walls and ceilings you plan to cover, rather than just the floor space of the room.
Consider a practical example: If you are finishing a basement with 400 square feet of combined wall and ceiling surface area, and your contractor bids $2.25 per square foot for material, hanging, taping, and sanding, the calculation is 400 x $2.25 = $900. Unit pricing is purely a comparative baseline; it does not replace an itemized quote.
When reviewing bids, ask specifically whether the quote includes:
- Delivery and staging of heavy drywall sheets
- Corner bead installation and metal trim work
- Disposal of scrap material and jobsite cleanup
- Primer application before final paint
- Protection of existing floors and fixtures
Material Options and Specialty Types

Not all drywall panels are created equal. Choosing the correct thickness and specialty board for specific areas of your home ensures structural integrity, fire safety, and moisture resistance.
Standard 1/2-Inch Drywall
Standard regular drywall is the most common material used for interior walls in residential construction. It is lightweight, easy to cut, and budget-friendly.
Try Our Free Calculators:
- Affordable pricing and widely available at any home center
- Simple to install and finish for standard rooms
- Provides minimal sound dampening and no special moisture resistance
Moisture-Resistant Drywall
Often referred to as greenboard or purple board, moisture-resistant drywall is engineered for damp environments like bathrooms, laundry rooms, and basements.
- Treats core and paper to resist mold, mildew, and casual water exposure
- Essential for passing local building code inspections in wet zones
- Slightly more expensive than standard boards and heavier to handle
Fire-Resistant Type X Drywall
Type X drywall incorporates glass fibers and other additives to slow the spread of flames, making it mandatory for attached garages, boiler rooms, and party walls between townhomes.
- Meets strict local fire codes for multi-family and garage construction
- Denser core offers better acoustic isolation between rooms
- Significantly heavier and harder to score and snap than standard boards
| Material Type | Typical Cost Level | Maintenance | Key Considerations |
|---|---|---|---|
| Standard (1/2-inch) | Low ($12 – $15 per sheet) | Low | Best for dry living areas and bedrooms. |
| Moisture-Resistant | Moderate ($15 – $20 per sheet) | Low | Required in bathrooms and basements. |
| Fire-Resistant (Type X) | Moderate ($18 – $24 per sheet) | Low | Mandatory for garages and utility rooms. |
| Soundproofing (QuietRock) | High ($45 – $80 per sheet) | Low | Great for home theaters and shared walls. |
What Makes Up the Total Cost?
Breaking down a drywall quote reveals why prices vary so much from one home to another. Labor is generally the largest line item, often accounting for 75% to 80% of the total expense, while materials make up the remaining 20% to 25%.
Labor Expenses
Hanging drywall requires physical strength and precision, while finishing (taping, mudding, and sanding) is an art form that requires years of experience to master. Professional finishers charge higher hourly or square-foot rates because a smooth, invisible finish determines the ultimate look of your paint.
Material Expenses
Beyond the panels themselves, you must budget for joint tape, joint compound (mud), corner beads, drywall screws, and sanding screens. If you want to calculate exact material needs, our Drywall Sheet Calculator helps you determine precisely how many panels to purchase without excessive waste.
Finishing Levels
Drywall finish is rated from Level 0 (no finishing) to Level 5 (a skim coat over the entire surface for high-end glossy paints). Most standard residential walls require a Level 4 finish, which adds to the labor time compared to a basic Level 3 finish intended for textured walls.
Illustrative Cost Scenario

To see how these costs combine in the real world, let us look at a typical hypothetical project: finishing a standard 400-square-foot basement room with 8-foot ceilings, resulting in roughly 600 total square feet of wall and ceiling surface area.
| Project Component | Estimated Cost |
|---|---|
| Materials (Standard & Moisture-Resistant Panels) | $300 |
| Fasteners, Tape, Mud, and Corner Beads | $100 |
| Labor (Hanging and Fastening) | $600 |
| Labor (Taping, Mudding, and Sanding – 3 Coats) | $750 |
| Waste Removal and Cleanup | $100 |
| Total Estimated Project Cost | $1,850 |
This illustrative scenario places the project at roughly $3.08 per square foot, which aligns closely with professional rates for small basement renovations requiring specialized moisture-resistant panels.
Hidden and Additional Costs to Anticipate
Unforeseen expenses can quickly derail a remodeling budget if you fail to plan for them ahead of time. Always add a 10% to 15% contingency fund to your drywall estimate.
- Demo and Removal: Tearing out old, water-damaged plaster or crumbling drywall costs an extra $1.00 to $2.00 per square foot for labor and dumpster rental fees.
- High Ceilings and Vaults: Working on vaulted ceilings or stairwells requires scaffolding rentals and specialized safety equipment, adding a 20% to 50% labor surcharge.
- Texturing: Applying knockdown, orange peel, or popcorn texture adds $0.80 to $2.00 per square foot depending on the technique and labor complexity.
- Permits: Major structural changes or room additions may require local building permits, though minor cosmetic drywall replacement typically does not trigger permit fees.
Common Mistakes to Avoid
Homeowners and DIY builders often make costly errors when tackling drywall projects. Being aware of these pitfalls saves time and money.
- Underestimating waste: Failing to add a 10% to 15% waste factor for cuts and breakages leaves you making extra trips to the lumber yard.
- Skipping primer: Painting directly over bare drywall and joint compound causes flashing, where the tape lines remain visible under the paint sheen.
- Rushing the drying process: Applying a second coat of joint compound before the first coat is completely dry leads to cracking, shrinking, and bubbling.
- Choosing the wrong thickness: Using thin 1/4-inch board on walls instead of 1/2-inch results in a flimsy surface that dents easily and fails to meet residential codes.
How to Lower the Cost of Drywall Installation
If you want to keep your project budget under control, several practical strategies can help minimize expenses without sacrificing quality.
Also Read:
- Keep the room layout simple. Minimize complex curves, arches, and architectural niches that require tedious hand-cutting and custom framing.
- Do the hanging yourself. You can save a substantial portion of the labor budget by hanging the panels on the walls yourself, then hiring a professional finisher to tape and mud the joints.
- Opt for standard finishes. Choose a standard flat paint finish over glossy sheens so you do not have to pay for an expensive Level 5 drywall skim coat.
- Clear the workspace completely. Remove all furniture, old flooring, and debris before the crew arrives so they can work efficiently without obstacles.
How to Get an Accurate Drywall Estimate
Getting reliable contractor bids requires preparation. Clear communication prevents misunderstandings and ensures apples-to-apples comparison between competing quotes.
Gather your room dimensions, ceiling heights, and note any tricky areas like stairwells or bulkheads. Contact at least three licensed local contractors for detailed written estimates. Ensure each quote explicitly breaks down material costs, labor hours, waste disposal, and finishing levels. For preliminary budgeting before you even make that first phone call, our House Construction Cost Calculator provides broad structural estimates to help you plan your wider renovation.
Understanding Wall Prep and Framing Inspection
Before any drywall sheet is fastened to the studs, the underlying framework must be thoroughly inspected. Warped studs, uneven framing, or protruding nails can compromise the flatness of your finished walls. Carpenters and drywall installers check the alignment using a long straightedge. Addressing framing issues prior to hanging panels prevents unsightly bulges and wavy lines.
Furthermore, ensure that all electrical wiring, plumbing runs, and insulation are fully completed and signed off by local inspectors. Once drywall is installed, accessing cavities behind the board becomes extremely difficult and expensive. Taking time during the framing stage ensures a smooth installation process and prevents costly teardowns later.
DIY Drywall Installation vs. Hiring a Professional
Many homeowners debate whether to tackle drywall installation themselves to save money or hire a professional crew. While hanging panels is a manageable DIY task for weekend warriors, finishing is an entirely different discipline.
Professional drywallers possess the muscle memory, specialized tools (such as automatic taping banjos, stilts, and mechanical sanders), and speed required to produce a seamless finish in a fraction of the time. A DIYer attempting a large room might spend weeks applying multiple coats of mud and generating massive amounts of fine dust, only to end up with visible seams under bright lighting. Consider handling simple repairs or small closets yourself, but leave main living spaces and large rooms to experienced specialists.
Regional Variations in Drywall Labor Rates
Geography plays a substantial role in your overall drywall project expenses. Labor rates fluctuate dramatically depending on the cost of living and local demand for construction trades.
In major metropolitan areas with high costs of living, professional drywall contractors charge significantly higher hourly or square-foot rates compared to rural markets. Additionally, travel surcharges may apply if your property is located far outside a contractor’s standard service radius. When requesting quotes, it is beneficial to work with local contractors who understand regional climate conditions, as humidity and temperature extremes can affect joint compound drying times and material performance.
Disposal and Cleanup Logistics
Scrap drywall generation is an inevitable part of any installation project. Cutting panels to fit around windows, doors, and electrical boxes creates considerable waste material.
Professional contractors typically include debris removal and cleanup in their initial bid, hauling away scrap pieces in a dedicated trailer or dumpster. If you are managing a DIY project or if your contractor excludes waste management, you will need to budget for a local dumpster rental or a haul-away service. Note that many municipal landfills have specific regulations regarding the disposal of construction and demolition debris, meaning you cannot simply toss heavy drywall chunks into your standard household trash bin.
Timeline Expectations for Drywall Projects
Knowing how long a drywall project helps you coordinate subsequent remodeling steps, such as painting and flooring installation. A standard 500-square-foot room generally follows a predictable timeline:
- Day 1: Material delivery, acclimatization, and framing inspection.
- Days 2 to 3: Hanging all wall and ceiling panels, fastening, and cutting out openings.
- Days 4 to 6: Taping joints, embedding corner beads, and applying the first and second coats of joint compound.
- Day 7: Applying the final skim coat or finish coat.
- Days 8 to 9: Thorough drying time, followed by complete sanding of all surfaces.
- Day 10: Final inspection, cleanup, and primer application.
Attempting to rush this timeline by applying wet coats over damp compound will compromise the integrity of the walls and ruin the final paint finish.
Step-by-Step Drywall Installation Workflow
To fully understand what your contractor is doing—or to plan a partial DIY job—it helps to trace the physical workflow of a professional crew:
- Layout and Measurement: Measuring wall spans to minimize butt joints and reduce sheet cuts.
- Hanging Ceilings First: Attaching panels to ceiling joists so that wall panels can hold up the ceiling edges.
- Hanging Walls: Placing sheets horizontally to bridge studs, leaving a small gap at the floor.
- Fastening: Driving screws precisely flush with the paper surface without tearing it.
- Taping and Embedding: Applying paper or mesh tape into the first coat of joint compound over every seam.
- Applying Mud Coats: Feathering out second and third coats of compound across joints and screw heads.
- Sanding: Smoothing dried compound using handheld sanding blocks or pole sanders.
- Priming: Sealing the porous paper and mud to prepare the surface for paint.
Common Drywall Tools and Equipment
If you decide to handle minor hanging or patching tasks yourself, having the right specialized tools makes the job infinitely easier:
- Drywall T-Square: Ensures straight, accurate cuts across 4-foot panels.
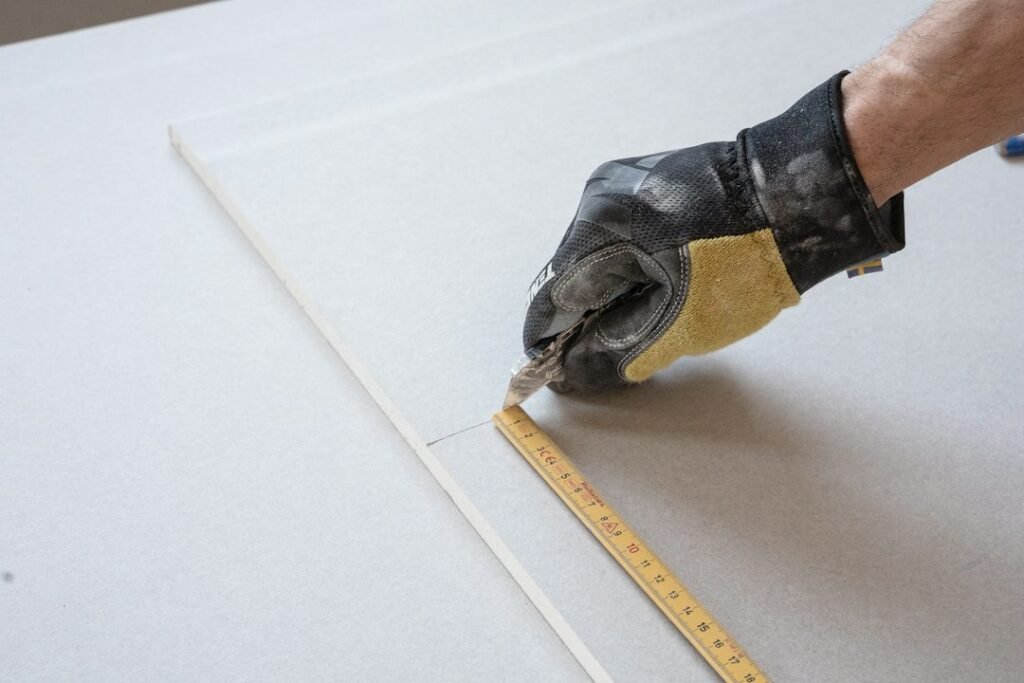
- Utility Knife with Snap-Off Blades: Used to score the face paper and snap the gypsum core.
- Keyhole Saw: Indispensable for cutting out electrical outlet boxes and switch openings.
- Taping Knives: Ranging from 4-inch to 12-inch blades for spreading mud and feathering seams.
- Mud Pan: Holds joint compound conveniently in one hand while you apply it with a knife.
- Cordless Screw Gun: Features an adjustable nosepiece to prevent over-driving fasteners through the paper facing.
Evaluating Drywall Bids and Contracts
When you have collected estimates from multiple drywall contractors, scrutinize the fine print to protect your investment. A professional contract should clearly specify the brand of drywall being installed, the exact sheet thicknesses (e.g., 1/2-inch regular vs. 5/8-inch Type X), the agreed-upon finish level, and a firm completion date.
Avoid contractors who demand the entire balance upfront. A standard industry practice is a modest deposit (such as 30%) upon signing, with milestone payments tied to hanging and finishing completion, and the final payment released only after you have inspected the work under strong lighting.
How Environmental Conditions Affect Drywall Installation
Temperature and humidity play a massive role in the success of a drywall job. Joint compound dries through evaporation, meaning high humidity or cold temperatures will drastically slow down the drying time between coats.
Professionals recommend maintaining an indoor temperature between 55 degrees Fahrenheit and 70 degrees Fahrenheit during the entire installation and finishing process. If a newly built home lacks permanent HVAC, temporary space heaters and commercial dehumidifiers must be deployed. Forcing mud to dry too quickly with direct high heat can cause surface cracking, while freezing temperatures will ruin the chemical integrity of the compound entirely.
Sound Transmission Class (STC) and Acoustic Drywall
In modern home design, sound isolation between rooms—such as home theaters, master bedrooms, and home offices—is an increasingly important consideration. Standard drywall provides minimal sound dampening, allowing noise to travel easily through wall cavities.
To achieve higher STC ratings, builders employ specialty acoustic panels like QuietRock, resilient channels, or multiple layers of drywall laminated with damping compounds like Green Glue. While these soundproofing upgrades increase material costs significantly, they provide a vastly quieter living environment for busy households.
Insulating Behind Drywall
Before the drywall crew seals up the room, you must ensure that all thermal and acoustic insulation is correctly installed. Common options include fiberglass batts, mineral wool, and spray foam insulation.
Mineral wool offers exceptional fire resistance and sound absorption, making it an ideal companion for high-end drywall installations. Inspect the framing cavities to ensure vapor barriers are installed according to your local climate zone requirements, preventing moisture from condensing behind your newly finished walls.
Final Quality Inspection Checklist
Before making your final payment to a drywall contractor, perform a thorough inspection using a bright work light held at an angle against the wall surface:
- Check all inside and outside corners for crisp, straight lines.
- Look for protruding screw heads or depressed fasteners that show through the mud.
- Verify that tape lines are completely feathered out and invisible to the touch.
- Ensure outlet boxes, vent covers, and switch plates fit neatly without gaps.
- Confirm that all scrap material, dust, and trash have been completely cleared from the jobsite.
Frequently Asked Questions
Can I install drywall myself to save money?
Yes, hanging drywall is a popular DIY project that can cut labor costs in half. However, finishing (taping, mudding, and sanding) requires considerable skill to achieve a smooth surface, so many homeowners hang the boards themselves and hire a professional for the finishing work.
How long does professional drywall installation take?
For an average 500-square-foot room, hanging panels takes about one day, while taping, mudding, and sanding takes 3 to 5 days due to the necessary drying time between coats of joint compound.
What thickness of drywall should I use for ceilings?
Ceilings typically require 5/8-inch drywall to prevent sagging between joists, especially if ceiling joists are spaced 24 inches apart. Walls generally use standard 1/2-inch drywall.
Is greenboard waterproof?
No, greenboard (moisture-resistant drywall) is water-resistant, not waterproof. It should not be installed inside shower enclosures or areas subject to direct, continuous water spray, where cement backer board is required instead.
How much does it cost to repair a hole in drywall?
Small patch repairs for doorknob holes or minor cracks typically cost between $100 and $300 for a handyman service call. Larger patches involving damaged studs or extensive area replacement can range from $300 to $600.
Does drywall installation include painting?
Usually, standard drywall installation includes applying a coat of drywall primer, but finished paint coats are billed separately unless explicitly negotiated in the contractor’s contract.
Final Takeaway
Drywall installation is a foundational step in any interior remodel, balancing protection, fire safety, and aesthetic appeal. Understanding the cost drivers helps you allocate your renovation budget effectively.
- National planning ranges fall between $1.50 and $3.00 per square foot installed.
- Labor accounts for the vast majority of total project expenses, typically 75% to 80%.
- Specialty rooms like bathrooms and garages require moisture- or fire-resistant panels that increase material costs.
- Proper finishing levels directly impact the final appearance of your paint and overall project satisfaction.
Before starting your project, utilize BuildCost.online’s suite of planning tools like the Drywall Cost Calculator and secure multiple local quotes to ensure fair pricing.
Estimates vary by location, supplier and site conditions and should be verified locally.