How Much Does Deck Railing Cost in 2026?
If you are planning a deck build or a simple safety upgrade, figuring out how to budget for your perimeter is usually one of the final hurdles. You want something secure that meets local building codes, but you also want it to look great without breaking the bank. So, how much does deck railing cost in 2026?
Deck railing costs between $15 and $75+ per linear foot for materials alone, while professional installation brings total costs to $30 to $150+ per linear foot. For a standard 200-linear-foot deck, total project expenses typically range from $3,000 to $15,000. Prices vary significantly based on your choice of material, labor rates in your area, total linear footage, and whether you include custom features like gates or integrated lighting.
Understanding these variables helps you set a realistic budget before you start shopping for materials or calling contractors. This guide breaks down pricing by material type, labor expenses, hidden fees, and practical ways to save money without compromising safety.
When planning a home improvement project, having a clear baseline helps prevent sticker shock. Deck railing prices are almost universally calculated per linear foot. This includes the top rail, bottom rail, posts, and balusters or infill panels. If you are replacing an existing railing, you must also factor in demolition and disposal fees before the new system goes in.
To give you a clearer picture, standard planning ranges encompass everything from basic pressure-treated wood to high-end architectural glass panels. Local labor rates, regional material availability, and deck height can push your project toward the lower or higher end of these spectrums. Remember that these are planning estimates rather than guaranteed contractor quotes.
| Railing Material | Material Cost (Per Linear Foot) | Installed Cost (Per Linear Foot) | Total for 200 Linear Feet |
|---|---|---|---|
| Pressure-Treated Wood | $10 – $25 | $25 – $50 | $5,000 – $10,000 |
| Vinyl / PVC | $20 – $40 | $40 – $75 | $8,000 – $15,000 |
| Aluminum | $30 – $60 | $60 – $110 | $12,000 – $22,000 |
| Composite | $35 – $70 | $70 – $130 | $14,000 – $26,000 |
| Cable Railing | $50 – $100 | $90 – $180 | $18,000 – $36,000 |
| Glass Panel | $75 – $150 | $150 – $300 | $30,000 – $60,000 |
Estimated Installed Cost for 200 Linear Feet of Railing
Chart note: Representative total installed project costs for a standard 200 linear foot deck perimeter based on current national averages.
For a preliminary planning estimate, BuildCost.online’s Deck Cost Calculator can help you outline your overall project budget alongside your railing expenses.
Understanding Cost Per Linear Foot and Labor Calculations
Calculating your deck railing costs starts with measuring the perimeter of your elevated deck or porch where a fall hazard exists. You measure the total linear footage, subtracting any openings for stairs if necessary, though stairs often add complexity and higher per-foot pricing. Unit pricing acts as a baseline comparison tool to weigh different materials against one another.
Here is a quick worked calculation for a typical project. If you select an aluminum railing system with an installed cost of $80 per linear foot, and your deck perimeter measures 150 linear feet, the math looks like this: 150 x $80 = $12,000. Keep in mind that specialized components like stair sections, custom corner posts, and matching gates are rarely priced at a flat linear rate and usually incur extra per-piece charges.
When hiring a professional, always review your contract closely. Ask specifically whether the quote includes:
- Permits: Local building department application and inspection fees.
- Demolition: Removal and disposal of your old railing system.
- Delivery: Freight or delivery surcharges for heavy materials like glass or stone posts.
- Hardware: Post anchors, structural fasteners, and hidden brackets.
- Lighting: Low-voltage post caps or stair riser lights if applicable.
Cost by Material: Wood Railing

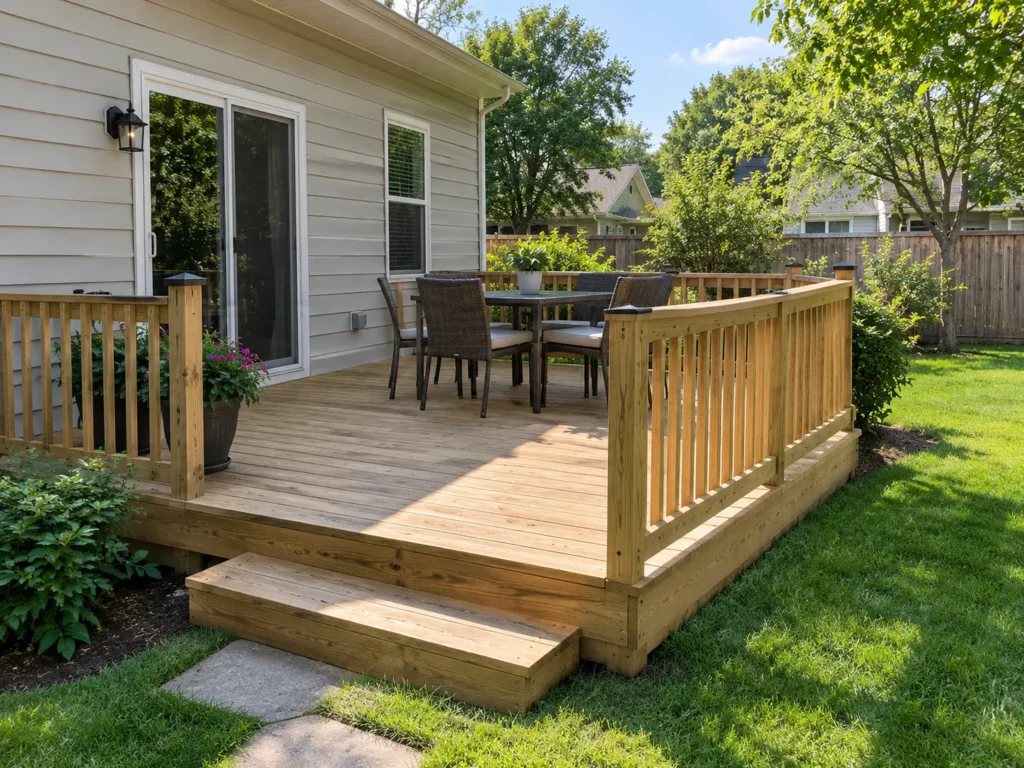
Wood remains a classic, traditional choice that matches natural surroundings and traditional home architectures. Pressure-treated pine is the most affordable option, while cedar and redwood offer richer natural grain and better resistance to natural decay. Wood allows for easy custom cuts and straightforward repairs using standard tools.
- Affordability: Lowest upfront material cost among all railing types.
- Customization: Easy to paint or stain to match your home exterior.
- Workability: Simple to cut and assemble for DIY builders.
The primary trade-off with wood is maintenance. Without regular staining, sealing, and inspections for splintering or rot, wooden railings deteriorate quickly under harsh weather conditions.
Try Our Free Calculators:
Cost by Material: Vinyl and PVC Railing

Vinyl and PVC systems provide a clean, uniform look that never requires painting. Manufacturers reinforce these hollow plastic profiles with aluminum or galvanized steel inserts to ensure they meet structural building codes. They resist fading, peeling, and moisture damage entirely.
- Low Maintenance: Requires only occasional washing with soap and water.
- Durability: Completely immune to rot, rust, and insect damage.
- Clean Aesthetic: Hides all structural fasteners for a sleek finish.
On the downside, vinyl can become brittle in extreme cold climates, and color choices are more limited compared to paintable wood or custom metal.
Cost by Material: Aluminum Railing

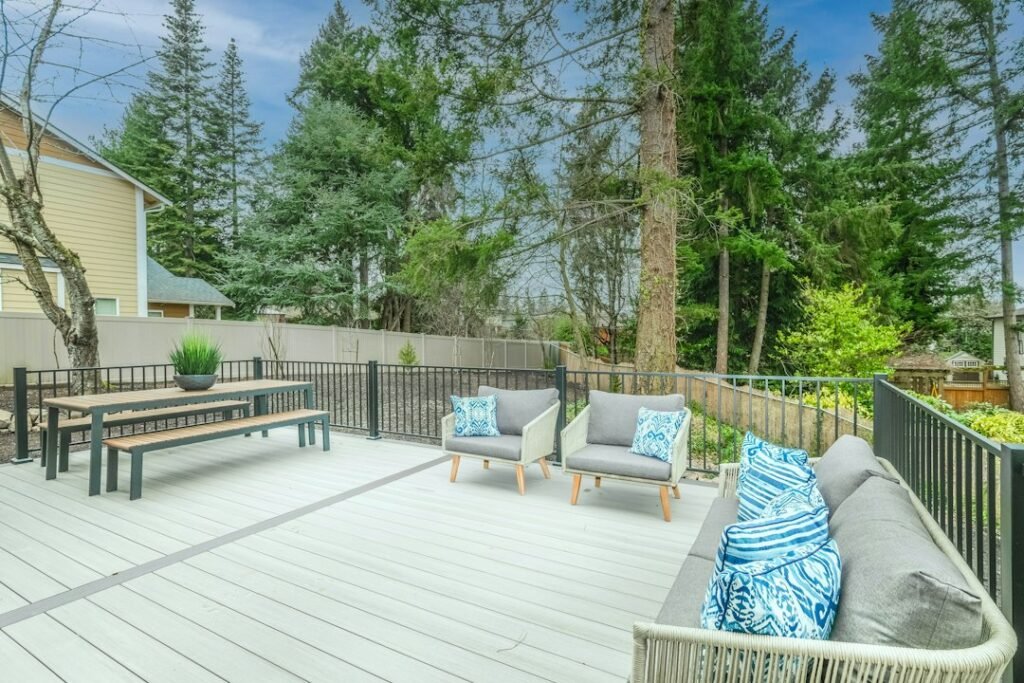
Aluminum has surged in popularity due to its sleek profile, exceptional strength, and modern aesthetic. It comes in pre-fabricated sections with durable powder-coated finishes that resist chipping, scratching, and fading. It pairs exceptionally well with composite decking boards.
- Strength-to-Weight Ratio: Incredibly sturdy while remaining relatively lightweight.
- Longevity: Virtually rust-proof and highly resistant to coastal salt air.
- View Preservation: Thinner balusters block less of your backyard view.
The main drawback is cost. High-grade architectural aluminum kits carry a steeper upfront price tag than basic wood or standard vinyl options.
Cost by Material: Composite Railing
Composite railing utilizes a blend of recycled wood fibers and plastic polymers, mirroring the same technology used for high-end decking boards. It mimics the look of painted wood without the associated maintenance headaches. It matches composite deck surfaces seamlessly for a unified design.
- Weather Resistance: Does not warp, splinter, or rot over time.
- Unified Design: Can match your exact deck board color or provide a striking contrast.
- Solid Feel: Heavier construction gives a sturdy, substantial grip.
Composite materials can absorb heat in direct sunlight, becoming quite warm to the touch, and expansion and contraction with temperature swings must be accounted for during installation.
Cost by Material: Cable Railing

Cable railing features thin stainless steel wires running horizontally or vertically between sturdy posts, usually made of wood, aluminum, or stainless steel. It offers a contemporary, unobstructed view, making it ideal for elevated decks overlooking scenic landscapes or waterfronts.
- Maximum Visibility: Near-invisible lines keep your line of sight wide open.
- Modern Style: Highly sought-after architectural trend that boosts home value.
- Durability: Marine-grade stainless steel cables stand up to harsh elements.
The steep price tag represents the main drawback. Specialized tensioners, heavy-duty posts, and precise installation labor make cable railing one of the most expensive choices available.
Cost by Material: Glass Panel Railing

Glass panel railing delivers an upscale, modern look with tempered or laminated safety glass panels functioning as the primary infill. It blocks brisk winds while maintaining crystal-clear sightlines. It is commonly chosen for rooftop decks, high-story balconies, and luxury modern homes.
- Wind Block: Acts as an effective barrier against heavy breezes on elevated platforms.
- Luxury Appeal: Premium aesthetic that maximizes natural light and views.
- Safety: High-impact tempered glass meets strict building code impact standards.
Glass demands frequent cleaning to remove water spots, fingerprints, and pollen, and the heavy materials require professional handling and expensive specialized hardware.
What Makes Up the Total Cost of Deck Railing?
Breaking down a railing quote reveals several distinct cost components beyond just buying the balusters and top rails. Understanding these line items ensures you do not encounter unexpected budget overruns mid-project.
Also Read:
- How Much Does Deck Installation Cost in 2026? Pricing, Materials, and Labor Breakdown
- Composite Deck vs Wood Deck Cost: 2026 Price Comparison
- Flooring Cost Calculator Guide: 2026 Price Estimates per Square Foot
- Deck Cost Calculator: Complete 2026 Guide to Pricing and Materials
- How Much Does a Deck Cost? 2026 Pricing Guide
Posts and Structural Anchors
Posts form the structural backbone of your safety barrier. Surface-mounted posts bolt directly onto the finished deck framing using heavy-duty bolts and backing plates, while fascia-mounted posts attach to the outer rim joist. Structural integrity depends heavily on these anchor points, which must withstand a 200-pound concentrated load per international residential codes (IRC).
Infill Options
The infill consists of the material filling the space between the top and bottom rails. Traditional vertical pickets are economical, while glass slats, horizontal cables, or decorative metal panels increase material and labor expenses significantly.
Gates and Stairs
Stair railings require specialized angles, custom-length balusters, and continuous graspable handrails to comply with building codes. Adding a self-closing security gate for child or pet safety adds $150 to $400 per gate in hardware and installation labor.
DIY vs. Professional Installation Costs
Deciding whether to install your deck railing yourself or hire a professional contractor comes down to your skill level, available tools, and free time. Professional installation typically costs between $20 and $75 per linear foot for labor alone, depending on the complexity of the material.
DIY installation saves you 50% or more on labor costs. Pre-assembled railing kits make the process manageable for handy homeowners with a miter saw, drill, and level. However, mistakes can be costly. Misaligned post spacing or improper anchoring can cause structural failure, failing local building inspections and forcing a complete do-over. For complex systems like cable or glass, professional installation is strongly recommended.
Hidden or Additional Costs to Anticipate
Unforeseen expenses can easily derail an otherwise well-planned budget. Keep these potential add-ons in mind when drafting your project finances.
- Permit Fees: Most municipalities require a building permit for deck and railing modifications, ranging from $50 to $250.
- Engineering Reviews: Some jurisdictions require stamped architectural drawings for glass or second-story cable railings.
- Disposal Fees: Hauling away old rotting wood or rusted metal rails to a local transfer station costs $75 to $200.
- Delivery Surcharges: Heavy materials like glass panels often carry freight delivery fees from local lumberyards.
Common Mistakes to Avoid
Avoiding common planning errors saves you time, frustration, and money during construction.
- Ignoring Local Codes: Failing to check IRC or local municipal height, spacing, and load requirements can force you to tear down non-compliant work.
- Skimping on Post Spacing: Placing posts too far apart weakens the entire structure and leads to sagging top rails.
- Forgetting Stair Handrails: Many codes require a graspable secondary handrail on stairs alongside the decorative railing.
- Buying Cheap Fasteners: Using low-quality steel screws on treated wood causes ugly rust streaks and premature joint failure.
How to Lower the Cost of Your Deck Railing Project
You do not have to compromise on safety to keep your project within a reasonable budget. Strategic planning helps cut unnecessary expenses.
- Choose pressure-treated wood: Opt for standard wood instead of glass or cable if you need to keep upfront expenses to an absolute minimum.
- Mix and match materials: Use high-end cable or composite railing on the main street-facing side of the deck and simpler wood along the back.
- Do the demolition yourself: Tear down and haul away your old railing system over a weekend to save on contractor labor hours.
- Use standard lengths: Buy pre-cut railing kits that match standard post-spacing measurements to minimize custom cutting waste.
How to Get an Accurate Deck Railing Estimate
Gathering precise estimates requires preparation. Measure your deck perimeter accurately, noting any stairs, corners, and gate openings. Check your local building department website for specific IRC height and baluster spacing rules in your area. Contact at least three licensed contractors for written bids, making sure each quote itemizes materials, labor, demolition, and permit fees separately. If you are comparing material options for a larger overall deck overhaul, using a dedicated tool like BuildCost.online’s Deck Replacement Cost Calculator provides an invaluable sanity check against contractor bids.
Advanced Planning and Design Considerations
When diving deeper into the nuances of a custom deck railing overhaul, homeowners must consider how architectural style and environmental exposures interact with long-term durability. For instance, homes located in coastal environments face accelerated corrosion due to salt spray, which can degrade standard steel fasteners and low-grade aluminum coatings within a single season. Upgrading to marine-grade stainless steel or specialized architectural powder coats adds roughly 15 to 25 percent to the initial material budget, but it prevents unsightly rust bleed and structural degradation over a 15-year horizon.
Another vital planning element involves the precise layout of post placements around complex deck geometries, such as multi-tiered platforms, octagon corners, and multi-directional stairs. Every corner transition requires dedicated corner posts or double-post configurations that interrupt standard pre-fabricated kit assemblies. Failing to account for these custom corner additions during the initial estimating phase can leave you short on critical hardware and connectors when your crew is midway through assembly.
Detailed Step-by-Step Deck Railing Installation Guide
If you are tackling a DIY railing installation for a standard pressure-treated wood or aluminum kit system, following a strict chronological workflow guarantees structural integrity and compliance with local building inspector standards.
Step 1: Layout and Site Preparation
Begin by mapping out the exact center points for every single post along your deck perimeter. Posts should never be spaced farther apart than the manufacturer’s maximum allowable span, which typically ranges from 4 feet to 6 feet depending on whether you are installing heavy glass panels or lightweight aluminum pickets. Mark your drill locations on the deck boards, ensuring that you have solid structural blocking underneath the framing to anchor your mounting hardware securely.
Step 2: Installing Post Anchors and Posts
Bolt your surface-mounted post bases or structural post brackets directly to the deck framing using heavy-duty structural bolts, washers, and under-deck backing plates. Slide your vertical posts over the structural mounts or fasten wood posts securely, using a heavy-duty carpenter’s level on two adjacent sides of each post to verify absolute vertical plumbness. Shim the bases slightly if minor framing irregularities exist, then tighten all through-bolts completely.
Step 3: Measuring and Cutting Rail Sections
Measure the exact distance between installed posts at both the top rail height and bottom rail height. Never assume all post spans are identical; minor shifts during framing can create variance of a quarter-inch or more. Use a miter saw equipped with a metal-cutting or wood-cutting blade to trim your top and bottom rails down to the exact required lengths, making sure to subtract allowances for bracket thicknesses specified in your manufacturer manual.
Step 4: Mounting Rail Brackets and Infill
Attach the upper and lower mounting brackets to the inside faces of your posts using the provided structural screws. Snap or slide your bottom rail into its lower brackets, then insert your balusters, glass slats, or tensioned cable runs according to the manufacturer sequence. Slide the top rail into place over the infill, securing it firmly into its upper brackets. For cable systems, use a hand-swaging tool or hydraulic crimper to secure your terminal fittings, then tighten each cable evenly from the center outward using threaded tensioners until you achieve a taut, secure feel that prevents a 4-inch sphere from passing through.
Step 5: Final Inspection and Handrail Tie-Ins
Walk the entire perimeter of your newly installed railing, applying firm lateral pressure to test for any excessive wobble or flex at the corner posts. Install post caps with outdoor-rated silicone adhesive, attach any low-voltage post cap lights, and verify that your stair railing includes a continuous graspable top rail positioned between 34 and 38 inches above the stair nosing line. Schedule your local building code inspection before scheduling any celebrations on your updated outdoor living space.
Regional Cost Variations and Material Longevity Analysis
Geographic location plays a surprisingly significant role in your final deck railing expenditures. Labor rates fluctuate wildly between urban metropolitan centers and rural counties, with urban contractor labor often commanding double the hourly rates seen in quieter regions. Furthermore, shipping logistics heavily impact custom materials. If you live in a remote mountainous or rural valley, freight delivery fees for large tempered glass panels or custom architectural ironwork can easily add $500 to $1,000 in specialized transportation surcharges.
Material longevity should also factor heavily into your financial planning. While pressure-treated wood offers the lowest initial cash outlay, its true lifetime cost includes annual pressure washing, semi-annual inspections, and complete stain re-application every two to three years. Over a 20-year span, the recurring cost of stains, sealers, replacement fasteners, and labor hours can make wood nearly as expensive as premium composite or aluminum systems that require virtually zero ongoing maintenance beyond simple soap-and-water cleaning.
Environmental Factors and Micro-Climate Impacts
Your local micro-climate can prematurely degrade certain railing materials if you fail to match the product to your environmental conditions. High-UV regions, such as the desert Southwest, cause standard vinyl and lower-grade plastics to chalk, fade, and become brittle within a few years. In these climates, thick-walled aluminum with high-grade architectural powder coats or naturally resilient cedar holds up far better against intense solar radiation.
Conversely, damp, shaded, or heavily wooded environments foster the rapid growth of mildew, mold, and wood-boring insects. If your deck sits in a moisture-heavy canopy, untreated wood or poorly sealed composite boards can trap moisture and harbor rot. Choosing solid aluminum or marine-grade stainless steel cable railings in these damp zones completely eliminates biological decay risks, protecting your structural investment for decades to come.
Budget Optimization Strategies for Large Commercial or Residential Decks
When managing an expansive multi-level deck spanning over 400 linear feet, minor per-foot price variations compound rapidly into massive financial swings. Savvy property owners and general contractors employ several specialized budget optimization techniques to keep large-scale projects manageable.
Bulk purchasing through regional building supply yards rather than big-box retail outlets often triggers contractor pricing tiers or volume discounts, reducing material costs by 10 to 18 percent. Additionally, simplifying the baluster design—such as opting for standard round aluminum spindles instead of intricate cast-iron baskets or custom laser-cut panels—saves significant labor installation hours across long linear runs. By balancing high-visibility accent zones with economical standard perimeter runs, you achieve a custom architectural look without inflating your construction budget beyond realistic parameters.
Frequently Asked Questions
What is the cheapest deck railing material?
Pressure-treated wood is the cheapest option, with materials running between $10 and $25 per linear foot. Installed costs range from $25 to $50 per linear foot, making it the most budget-friendly choice for DIY builders.
How high does a deck railing need to be by law?
According to the International Residential Code (IRC), decks that are elevated more than 30 inches above grade generally require a railing that is at least 36 inches high from the deck surface to the top of the rail.
How far apart can deck railing posts be placed?
Most standard deck railing systems require structural posts to be spaced no more than 4 to 6 feet apart to meet building code load requirements. Always check your specific manufacturer instructions and local code guidelines.
How wide can baluster spacing be on a deck railing?
The IRC mandates that balusters, pickets, or cable spacing must be narrow enough that a 4-inch sphere cannot pass through any opening. This prevents small children from slipping through the perimeter.
Is cable railing more expensive than wood railing?
Yes, cable railing is significantly more expensive than wood. While wood costs $25 to $50 per linear foot installed, cable railing typically ranges from $90 to $180 per linear foot due to specialized stainless steel components and labor.
Do I need a building permit to replace my deck railing?
Many local building departments require a permit for structural deck modifications and railing replacements to ensure safety compliance. Always check with your local municipal office before starting work.
How long does deck railing installation take?
For an experienced DIYer or professional crew, installing railing on a standard 200-linear-foot deck typically takes one to two full days. Complex materials like glass or custom wood may require additional time.
Final Takeaway
Planning your deck railing budget requires balancing upfront material costs, long-term maintenance requirements, and local building safety codes. Whether you choose economical wood or luxury glass panels, understanding the breakdown per linear foot keeps your project on track.
- Pressure-treated wood costs $25 to $50 per linear foot installed.
- Mid-range vinyl, aluminum, and composite systems range from $40 to $130 per linear foot.
- High-end cable and glass options range from $90 to $300+ per linear foot.
Material choice and professional labor rates remain the largest drivers of total project expense. To refine your planning, utilize BuildCost.online’s Deck Cost Calculator and secure multiple local contractor bids before starting construction.
Estimates vary by location, supplier, and site conditions and should be verified locally.